Installing Handlebar Tape

|

Drop handlebars really need to be taped or otherwise covered. This is not just about cushioning/insulation, but also about traction. If your handlebars are slippery, they'll force you to hold them with a "death grip" to keep from sliding, which will lead to hand/wrist pain.
(Note: in this article, the word "handlebar" is used in its correct historical sense, referring to the entire part extending to both sides. In the early days of bicycling, the handlebar actually was a solid bar rather than a hollow tube, but the name stuck. Sheldon was a Francophile, yet he anglicized "derailleur" to "derailer". I'm not going to rock the boat -- er -- bike -- with "handletube". It doesn't roll off the tongue as nicely as "handlebar" anyway..-- John Allen.)
OK, now, first let's look at the types and characteristics of handlebar tape. Foam grips also are seen from time to time. They are different enough that they have their own section in this article.
Most tape these days is thick, for comfort. Three types of thick tape are common these days: padded plastic, cloth and "cork". Leather tape is also widely available; thin plastic tape used to be popular but is now less so. You can still find it on eBay and from some specialty retailers.
This type of tape is relatively comfortable, though non-permeable to water so it doesn't "breathe" -- or get soaked in wet weather. Padded plastic tape is generally sold as a boxed package with two coils of tape, adhesive strips and handlebar end plugs. Bontrager tape is shown in the photo below.
What comes in a package of Bontrager tape: two rolls of tape,
two adhesive strips (left) and extra tape to cover the gaps at the brake levers.

Sheldon generally used Cinelli "Cork" tape. This may contain cork particles in a binder material. We aren't sure. "Cork" tape has a matte appearance; plastic tape usually has a shiny surface.

Cloth bias-woven cloth tape was the norm from the late '70s well into the '80s. It is particularly associated with French bicycles, and the major brand, Velox, is French. This tape is adhesive-backed, and is applied pretty much the same as padded plastic. It is usually sold in single rolls. It isn't all that stretchy, so you may need to apply a LOT of tension to keep it from wrinkling where it rounds bends in the handlebars. It tends to be narrow, somewhat compensating for the lack of stretchiness, as does the bias weave. It is convenient to wrap, because the roll holds together as you wrap the tape. Rivendell Bicycle Works has a Web page and video showing installation of cloth tape and securing the end with twine; see links at the end of this page..
Velox Tressostar cloth handlebar tape

Rivet Cycle Works and Brooks of England, which make leather saddles, also make leather handlebar tape which winds onto the handlebar like plastic or cloth tape. There are other brands as well, and a type that is sewn onto the handlebars. Leather tape is permeable to water and often perforated. It is more expensive than other types.
Rivet leather handlebar tape

Thin, non-adhesive plastic tape is best applied from the center of the bar towards the ends. The starting end is covered by the overlap near the stem, and the finishing ends are tucked into the ends of the handlebars and secured by the plugs. This is the only type of tape that should be applied from the center outwards toward the ends.

The first eight characteristics are obvious from looking at tape and handling it. The last three are not so obvious, but they can be important.
First things first: make sure that the brake and shift levers are the correct ones, installed where you want them and working correctly. When the tape is off the handlebar is a good time to clean the brake-lever hoods. Use detergent, water: and a scrub brush: rubber can expand as it soaks up petroleum-based solvents.
With modern brake levers, the brake cables run along the upper section of the handlebar, under the tape. Some brake/shifters run the shift cables along the rear of the handlebar.
The handlebar may have an indented groove at the front between the brake levers for aero brake cables. Some handlebars also have a groove at the rear for shift cables. If no cable will be running in the groove, it is best to fill the groove with a narrow strip from an old inner tube or excess handlebar tape, so that the groove does not leave a flat spot as you wind tape over it.
It is important to secure the cables snugly so that they don't move when the tape is installed or the brakes are applied. We usually do this with plastic electrician's tape. Test applying the brakes before securing the cables to be sure that the cable housing is fuly seated in the levers. A test ride without tape on the handlebars is a luxury available to the home mechanic; a shop mechanic must usually rely on experience. Wear gloves with padded palms for the test ride.
Some folks cut multiple short strips of electrician's tape to secure the cables, but we prefer to just wind a continuous open helix of tape along the bar. This saves time and is more secure. You can unwind and rewind the tape if you decide to reposition the brake levers.Handlebar prepared for taping, brake cables secured with electrician's tape
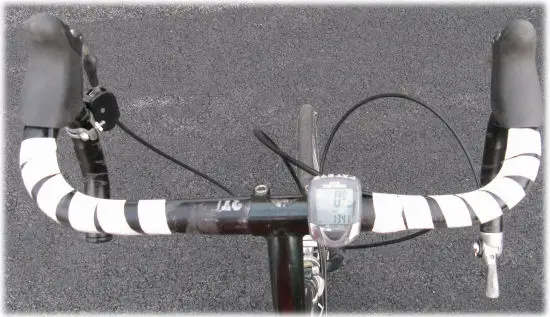
The handlebar shown is on a bicycle with a Sachs 3 x 7 hybrid-gearing hub, which I (John Allen) am shifting with a Sachs trigger control and a Shimano bar-end shifter.
Cables from some brake-lever shifters exit toward the space in front of the handlebar and get in the way of a handlebar bag, one of several reasons I (John Allen) prefer bar-end shifters.
The bar-end shifter's cable exits under the handlebar. The cable may be routed under the handlebar tape for a short distance, and held in place with electrician's tape where it will come out from under the handlebar tape.

But then, the cable housing can't being replaced without retaping the handlebar.

Shimano provides a plastic sheath that goes under the handlebar tape and allows the cable housing to be slipped out-- especially helpful with stiff, failure-prone index-compatible cable housing.

Now let's look at trigger shifters. A Sturmey-Archer trigger's clamp bolt passes through the body, so it can be mounted with the lever facing up or down.

A Sachs trigger shifter, as on the handlebar shown, must be mounted with the lever facing up if on the left side, or down on the right side, so its clamp bolt doesn't dig into the palm of the hand. With other hardware, you might discover an issue like this only with a test ride.
The cable routing shown is direct. If the lever faces down, the cable can be routed under the handlebar tape, at the cost of some added friction. Sachs and Sturmey-Archer trigger shifters are not interchangeable, as they pull different amounts of cable.

How important can it be to check lever position -- can I reach the lever of the Sachs trigger shifter from above? The photo shows that I can, with my middle finger by reaching under the brake lever. It's much more convenient than it looks!
Generally, handlebar tape should be started at the ends of the bars, winding toward the middle. The reason for this is the direction of the overlap, specifically in the area of the "corners" (the upper, forward bend of the handlebar.) If you start at the ends of the bar, the layers overlap one another like the shingles of a roof, with the upper edge of the tape protected by the next winding up from it.
If you start from the middle and work toward the ends, the upper edges of the tape are exposed, and hand pressure will tend to roll them down and away from the handlebar.
The exception to this is thin plastic tape, which is usually immune to this sort of failure, if installed with sufficient tension.
Whether you start from the middle or from the ends, make sure to start in the same way on both sides. Sheldon generally started from the underside of the bar with the tape feeding outwards. You can do it the other way too, but make sure you follow the same pattern on both sides if you want the job to look professional.
People could debate the winding direction endlessly, like chain lubrication, because there is no perfect solution -- tape will eventually fray or loosen, either way. I (John Allen) have given the issue of winding direction more thought-- maybe too much, and it is a nerdy discussion so I have placed it at the end of this article.
![]()
![]()
The usual failure mode of handlebar tape jobs is that the tape on the corners of the bars will slide down, exposing gaps. Proper tension helps prevent this, but it is also helpful to use a strip of "traction" tape.
I usually use traditional cloth handlebar tape for this purpose, a strip running along the top/rear of the bar around the corners. This enhances the tape's traction, and adds a little bit of extra padding where it can do the most good as well.
Good tension keeps the tape from slipping, and also reduces the tendency of the tape to wrinkle where it goes around the bent parts of the handlebar.
Before you start, make sure you have all of the necessary tools and materials at hand. Wash and dry your hands carefully, not just to keep the tape from getting soiled, but also so that oils from your skin won't compromise the connection between the tape and the handlebars.
You will need a good pair of scissors. Make sure that you can reach them without having to let go of the tape. Once you start to wind the tape you must never release the tension on it until the job is complete.
If the phone rings while you're in the middle of the job, let the caller leave a message.
Tape is supplied in rolls long enough for one side of the handlebar, left or right, with some excess. Two rolls of tape may be packaged together, with one adhesive strip (for each roll) to secure them. You work with one roll at a time. Cut 6 inches off the end of one roll and set that piece aside, for where the tape passes the brake lever, unless strips already have been provided. If additional hardware is mounted where the handlebar will be taped, you may need a couple more inches to cover gaps..
Roll up the rubber brake hoods, inside out, to expose the bodies of the levers. The tape always goes underneath the rubber hoods. This way, the brake levers can be removed and replaced without retaping. If a hood will not stay up, you could loosen the lever assembly from the handlebar -- though with many levers, removing the cable is necessary to get at the attachment bolt. Or you could also pry up the edge of the hood carefully with a flat-blade screwdriver as you pass the tape underneath. But we are getting ahead of ourselves.
Use scissors to make a long diagonal cut so that the blunt starting end of the tape is only about half the full width of the tape. The diagonal cut is about 3 inches long, and the cut section matches the end of the handlebar.
Start with the square end at the bottom of the bar, pulling the loose end up and out. Tape may be started by overlapping the end of the handlebar and pinching the end inside the handlebar end plug, but some end plugs, and bar-end shifters,, the tape can't be pinched inside the end plug. You could wrap electrician's tape around the first turn to help hold it in place, making sure to cover the electrician's tape with the next turn so it doesn't show.
Handlebar end, tape and end plug

The diagonal cut permits a constant overlap of the tape, so there's no thick lumpy section at the end of the bar. Modern tape is fairly thick, so you should try to keep the overlap pretty much constant, to avoid lumpiness. The first turn wraps the end of the handlebar all the way around, and then you angle the tape to wind its way up toward the brake laver.
Many shifters for internal-gear hubs can't be mounted on drop bars, with their slightly larger diameter. A bendable steel clamp band allows a trigger shifter to be mounted on drop bars, using a slightly longer bolt than originally supplied. Mount a trigger shifter under a brake lever where it is protected if the bicycle falls over. It will not dig into the hand as it would if mounted at the end of the handlebar.
The tape is pulled as far as possible under the trigger shifter before and after passing over the clamp.

A short strip of tape hides the clamp at the outside of the handlebar; another on the inside for the Sturmey-Archer trigger. The Sachs trigger's protruding assembly at the inside of the handlebar remains exposed. There isn't much to do about that short of placing some kind of cap over it, and possibly slitting the tape to pass around it. In any case, because the clamp is integral with the shifter, the shifter can't be replaced without retaping.

Where the tape passes the brake lever, it must leap ahead, leaving the clamp partly uncovered. You may run a strip in a U shape from under one side of the brake lever hood around the handlebar to the other. If the tape is narrow, you may need two strips, side by side.

Or you may use a 3-inch strip parallel with each side of the brake-lever hood. Place the end of a strip underneath the last turn of tape before the brake lever, aligning it so one edge goes under the brake lever hood, (red arrows in photo below).
As you wind the tape past the brake lever, hold it under extra tension, to avoid wrinkles. Make sure that you don't leave any part of the bare handlebar or brake-lever clamp uncovered. You may have to wind and unwind the tape and reposition it slightly to get this right. You may use a "spiral staircase" wrap, where the tape continues in its helical path from the bottom to the top of the hood.. Especially with thin cloth tape, you may use a "figure-8" wrap or special wrap, which reverse the direction of winding. See the links at the end of this article for more about that.

The photo below shows the "shingle" effect (green arrow) which results from starting taping from outside to inside on the underside at the end of the handlebar, and the exposed Sachs trigger tabs, bolt and nut (red arrow). The tape should usually extend far enough toward the center of the handlebar that your hand has room to sit entirely on the tape. A carbon-fiber handlebar may have a longer bulge at the center, so the tape toes not go as close to the center. As with the beginning, cut the end diagonally, but the end section is a full-width diagonal cut, about 6 inches long tapering to a sharp point. The adhesive finishing strip will then fit without wrinkling, since the tape thickness is constant right up to the cut end. The Bontrager finishing strip shown is elastic and should be stretched so it secures the tape well. Pull it in the same direction as the tape was wrapped. Cloth tape, in particular, can be finished with a wrap of twine, as described on the Rivendell Bicycle Works page linked at the end of this article.

Foam grips such as "Grab-on" brand were quite popular in the late '70s and early '80s. They cushion road impacts and can be a good choice for riders with long fingers. Foam grips provide excellent insulation for winter riding. Some riders like to cover them with a layer of cloth tape to make the foam a bit firmer, and to protect it. This will require two rolls of cloth tape at either side, due to the larger diameter.

Installing foam grips is often quite a struggle. Our favorite approach is to use hair spray as a lubricant. Spray into the grips, while holding one end covered, and also spray copiously on the handlebar just before sliding the grip on. It is a good idea to wear a mask so you don't inhale hair spray.
We also keep a hypodermic syringe handy, filled with rubbing alcohol. If the grips get stuck part way on, we jab the needle through the foam at a shallow angle so that it will pierce through to the handlebar, and give a good squirt of alcohol. That will free the grip. This is also a good way to remove the grips when necessary, without damaging them.
When installing foam grips with cable housing running under, as for "æro" brake levers, you do not tape the housing in place. Get the housing segments carefully sized first, then thread a bare cable through the housing starting at the brake-lever end. Stick the end of the cable through the foam grip before sliding it onto the handlebar. Once the grip is in place, pull on the bare cable so the fitting for the brake lever draws the housing through the grip. Withdraw the cable and install the brake lever and the cable all the way to the brake. If the housing is too long at the brake lever, pull it through at the center of the handlebar; it too short, inch it into place by depressing the brake lever, then readjusting the cable at the brake as many times as needed till it comes up tight.
Sometimes, foam grips may be counterproductive, due to the "two-bump problem."
OK, here's the nerdy discussion of which way to wind the tape.
Calvin Jones of Park Tools has pointed out that the common wrist movement which tries to twist the tape rotates the hand outward on the drops and upward (wrist down) on the tops. The tape must resist this rotation.
Let's look first at the drops.
Which is better? I can't be entirely sure. In any case, the usual problem with tape loosening is on the tops, at the curve behind the brake lever. Let's look at that.
The tape is probably secured well around the brake lever, due to the twists and turns it must make, suggesting that tape which tightens toward the brake levers is preferable. That is, however, opposite on the tops and the drops. Calvin Jones shows how to wrap the tape around the brake lever to reverse its winding direction, worth considering if it proves important.
Regardless of the outcome of this discussion, holding the tape under tension when installing it is important. Like abicycle wheel's spokes or the fabric of the tire, the tape holds its form only when under tension. But also, the capstan effect takes on an unusual twist (literally). Change in tension is relative to the static, fixed tension, increasing to that value at one side of where the hand disturbs it, decreasing on the other.
Again, how securely the tape is attached matters. Rivendell Bicycle Works suggests a very secure attachment at the top of the handlebar, using twine. This works with cloth tape but might damage thicker cork or synthetic tape -- which is often sold with an adhesive strip. Electrician's tape may also be used, and as Calvin Jones suggests, spot-melted to keep it from slipping.
I (John Allen) am conducting an experiment. I have wound the tape a different way on each side, and will see which way works better. You may get an answer in the fullness of time. Or I may already have an answer: tension is more important -- see the second image below.
Wrong way! - but all in the interest of science

Maybe it doesn't make any important difference!
Here's a taping which has failed on both sides despite opposite winding directions.
The gap is harder to see on the left side because it is over a strip of black electrician's tape.

![]()
![]()
Park Tool instructions with special wrap around brake lever