Servicing Bike Friday Hinges

|

Bike Friday is an American manufacturer of high-performance small-wheel bicycles which fold and partially disassemble to fit into a hard-sided Samsonite suitcase. The bicycle then travels as ordinary airline checked baggage, avoiding the usual inflated charge for bicycles. The suitcase doubles as a bicycle trailer.
Most parts of common Bike Friday models -- the New World Tourist, Pocket Rocket, Pocket Llama, Crusoe -- are conventional and familiar. Frame hinges are the major exception.
There is a barrel hinge behind the bottom bracket, so the rear wheel can fold underneath and then up next to the front of the frame. Some models have a second hinge, so the seat mast can fold forward. (The alternative is a telescoping, removable seat mast). A quick-release assembly behind the seat mast holds the parts together in position for riding.
Bike Friday hinges
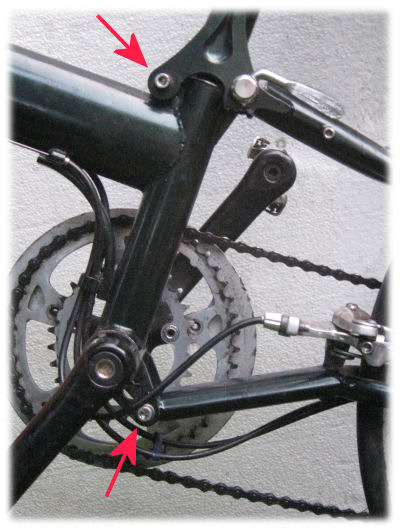
After several years of use, the lower hinge of my Bike Friday New World Tourist started creaking as I pedaled. I discovered that a bolt at one side of the hinge had loosened. Tightening the bolt stopped the noise, but the bolt loosened again when I folded and unfolded the bicycle -- and the noise returned.
A loose upper hinge will make a clunking sound, and you may feel the vibration through the saddle.
Here's what I learned from Tim Link at Bike Friday's customer service desk and from my work to fix the problem.
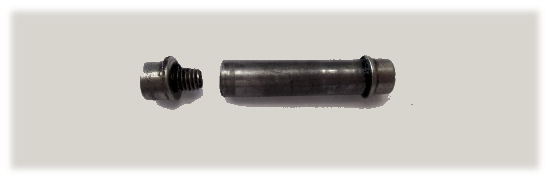
The hinge has a cylindrical pin which extends through a hole (the hinge's barrel) and through tabs on either side. A bolt with a washer under its head secures the pin at each end and is supposed to clamp tight against the tab. The pin is supposed to rotate inside the barrel, so the bolts, pin and tabs all turn together. If the pin or barrel becomes corroded, then the pin rotates with he barrel and can loosen a bolt. The pin and the barrel are most likely to corrode if the bicycle is used in winter and in wet weather.
If you hear creaking or clunking, don't let it go too long, because a bolt is loosening, and it may fall off and get lost. These bolts on older Bike Fridays are only 12 mm long. As already noted, tightening the bolts only achieves a temporary fix. To put an end to the noise, you have to take the hinge pin out, clean out corrosion, then lubricate and reassemble.
Do this every year or two even if you don't notice a problem, so the hinges stay well-lubricated and don't corrode.
Note that the lower and upper hinge pins are different. Even on older Bike Fridays, where both attach using 12 mm bolts, the upper hinge pin is shorter.
Tim Link adds the following information:
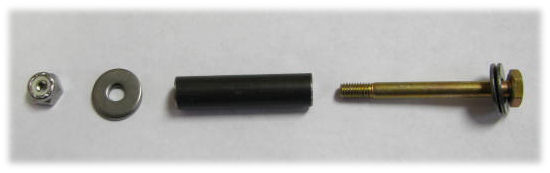
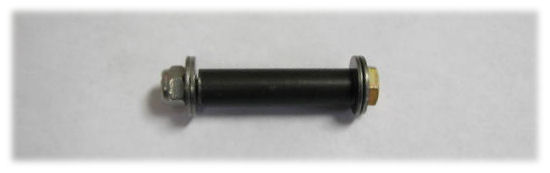
Since building your frame we've changed the hinges a few times. The seat mast hinge is pretty much the same except that instead of a bolt threading in to each end of the pin itself, there's a long thin bolt that goes all the way through and threads into a self locking nut on the other side. This eliminates the problem with the bolts falling out.
Old-style hinge pin with 12 mm long bolts
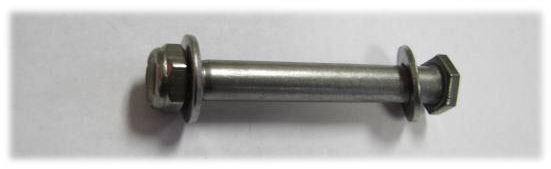
Hinge pin with through bolt
Hinge pin with through bolt, assembled
This same design was used on the bottom-bracket hinge for a while, but now the bottom-bracket hinge uses a solid bolt as the pin itself, with a self-locking nut on the threaded end. These are much easier to remove, and since the bolt is stainless they don't rust into place.
Bolt as pin
There's another kind of pin used occasionally, which is composed of two "half pins" that thread into each other, with a set screw that holds them together. These are only used on the Super Pros.
Half pins with set screw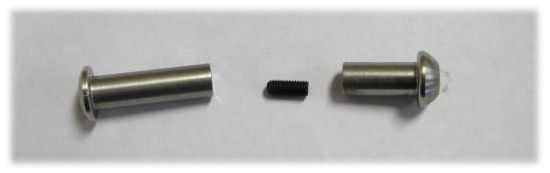
Assembling half pins with set screw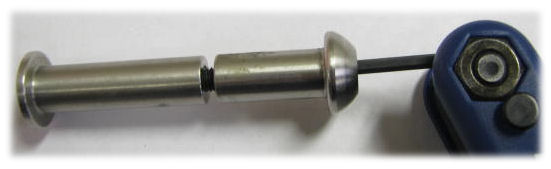
Half pins, assembled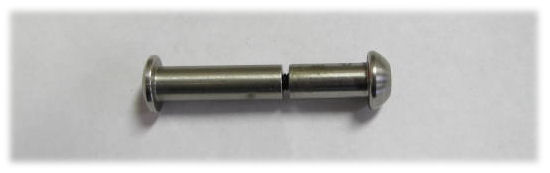
The maintenance procedure is essentially the same in any case: gather tools, prepare the bicycle, disassemble, clean, lubricate and reassemble. The procedure described below is for my 1997 New World Tourist. Generally, it is easier for newer bicycles which have only a single bolt for each hinge.
![]()
![]()
(These are as for my 1997 New World Tourist)
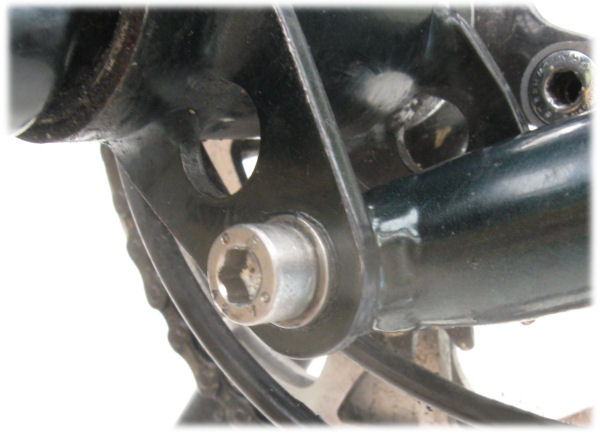
Lower hinge of Bike Friday
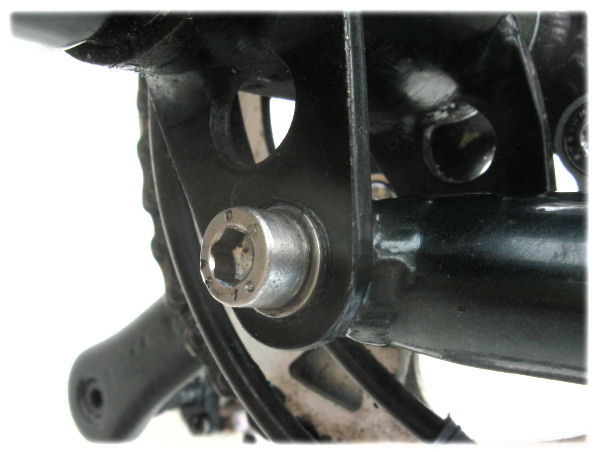
Disassembly trick: brake bolt threaded into one end of the hinge pin
Liquid Wrench spray lube may help to free a corroded pin. If the pin is very hard to remove, you definitely should use a flat-ended punch rather than to risk damaging the threads. Tim said that in tough cases, removing the pin might require an arbor press -- a floor-standing machine-shop tool. Using this tool requires removing the right crank, supporting the bike lying sideways across the arbor press's table, and supporting the tab on the lower side using a jig with a hole large enough for the pin to pass through . (Or send the bike to the factory...) Another option is to use a bench vise to loosen the pin, with a bolt pressing on one end aand a washer surrounding the other.
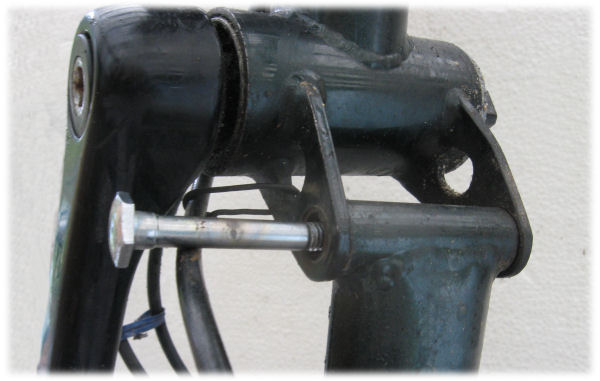
Brake bolt pushed in, pin pushed out.
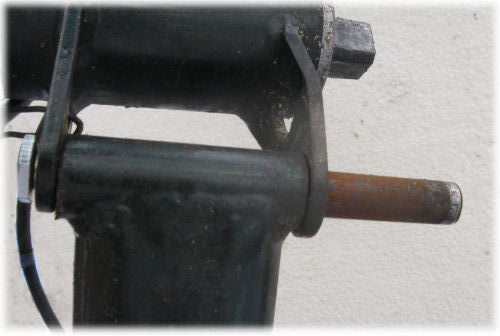
Fortunately, only surface rust...
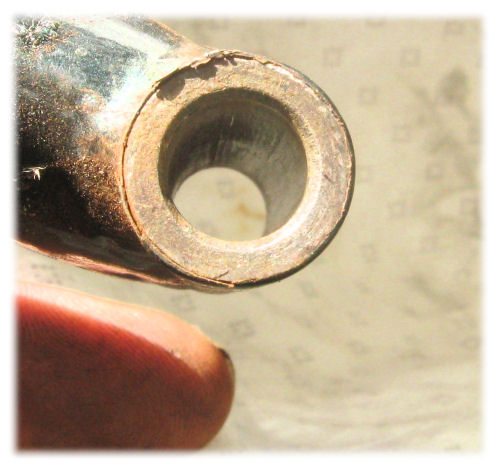
The barrel, mostly cleaned out.
Fingertip for scale.
Dirt under fingernail
because I'm not afraid to get my hands dirty :-)
The isntructions below are for the old-type pin. With the newer kinds that use a locking nut, you need only tighten the nut, then back it off enough so the hinge turns freely.
Finished reassembly!
![]()
![]()
![]()
Last Updated: by John Allen