|
|

|

![]()
![]()
Hydraulic disc brake. photo: Wikimedia Commons
Read this article in connection with:
Mountain bikes first used cantilever brakes; next, direct-pull brakes, which avoided the risk of snagging a transverse cable on a knobby tire. But mountain-bike rims are often wet, muddy and warped, making for problems with any rim brakes.
Disc brakes have become increasingly popular on mountain bikes and are gaining some popularity for other bicycles..
John Olsen, expert mountain bike rider and engineer (and who supplied the photo at the left here), reports:
"When I got my first mountain bike disc brake that worked, the advantages off road were so overwhelming that I changed every bike I had over to them as rapidly as possible. Hub and rim and spoke design essentially didn't change, except for disc mount provisions on the hubs."
For bicycles used on-road, the advantages of disc brakes aren't as compelling. To some extent, they are a fashion statement, imitating motor-vehicle practice.
But be aware: disc brakes can't be retrofitted without frame modification. A front disc brake stresses the fork heavily and can tear the front wheel out of the dropouts unless a special hub and fork are used.
![]()
![]()
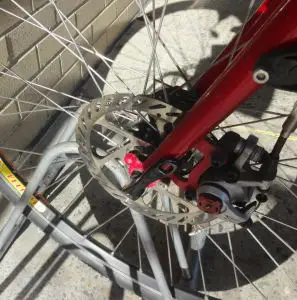
 The disc is vulnerable and easily bent. Other hub brakes do not have this weakness. As the photo at the right shows, caution is needed with bike racks.
 All in all, disc brakes are advantageous on bicycles which have front suspension and are ridden in mud and snow. A large rear disk brake can serve well as a downhill drag brake on a tandem or cargo bike. Disc brakes are less suitable for bicycles where light weight is most important and the rim can do double duty as a brake disc.
Avid cyclist and bicycle customizer Bruce Ingle has disc brakes on a fatbike he rides in winter, but he also says...
I'm baffled at the appeal of disc brakes for road bikes at this point, practically speaking. I can understand the allure of just swapping wheelsets just to change tire width without changing outside diameter and not needing aluminum rim braking surfaces, but disc brakes howl when wet and they're only slightly less maddening than a chain case to remove and replace a wheel. I've yet to do so without a work stand and tools, since the caliper has required re-centering every time the rear wheel is replaced. Rim and drum brakes don't have this problem, and they can be used with existing framesets.
I certainly can't see disc brakes for pro racing, since they would prevent the 8-second wheel change -- inserting the disc into the narrow slot in the caliper requires some finesse, so you can't just slap it into place.
![]()
![]()
The disc-brake rotor becomes thinner as it wears. A thin rotor is weak and prone to warping or breakage. With most brands, if the rotor is less than 1.5 mm thick, or seriously concave, it should be replaced. Moment Industries specifies 1.7 mm and Hayes, 1.52 mm. See Aaron Goss's Web page, linked below, for details. He also sells thicker rotors for cyclists who are not weight weenies.
As already mentioned, pads also wear. Wear limits are different for different pads -- check manufacturer's specifications.
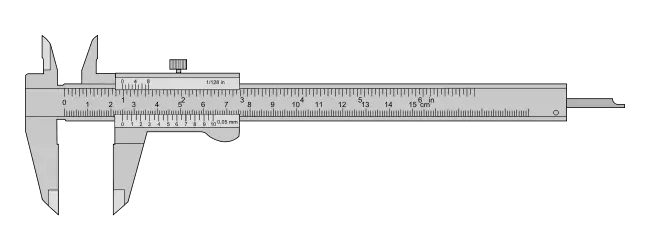
The thickness of a rotor cannot be measured directly with a conventional vernier caliper, due to the concavity.
Vernier caliper (image by Lucasbosch, from Wikimedia Commons)
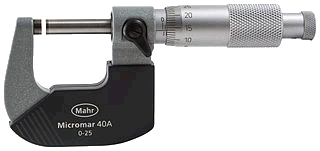
You need to use a micrometer caliper or you could make a simple accessory tool by cutting and bending a spoke so a length of it lies flat along either side of the rotor. Then a vernier caliper or digital caliper could be used. Subtract twice the thickness of the spoke, and you have your measurement.
Micrometer caliper (image by Lucasbosch, from Wikimedia Commons)
Disc brakes are traditionally mounted on the left side of the bicycle. Some motorcycles have dual disc brakes, one on each side of the front wheel, but the added weight would be undesirable on a bicycle. One-sided mounting results in an unbalanced load on the fork, potentially leading to handling and safety issues. The load on the fork is heavy because the torque from braking is taken up at a relatively short distance from the hub.
As already noted, a front disc brake with the caliper in the usual position behind the left fork blade exerts a strong force tending to pull the hub axle out of the dropout. It has been conclusively shown that the alternation of force upward from weight and downward from the brake can loosen the quick-release of a front hub.
A suspension front fork and a disc brake work well together because the fork must have large-diameter sliders (lower part of each fork blade) and the left slider alone can easily bear the load from the disc brake. However, a through-axle front hub (one where the axle mounts into holes rather than slots) is still necessary to avoid the possibility of front-wheel loss. A disc brake caliper placed ahead of the fork blade would tend to pull the hub axle into rather than out of the fork, but is not usual.
There has been a recall of over 1 million Trek bicycles where the quick-release lever can open more than 180 degrees and catch on the disc rotor, resulting in ejection of the wheel. (see our article about this.) This problem is not limited only to Trek bicycles. It might also be possible for the lever to catch on the spokes of a wheel without a disc brake.
A front drum brake or Rollerbrake, by way of comparison, also exerts an unbalanced load on the fork, but does not tend to pull the wheel out of the dropout.
It goes without saying that the cable to any front hub brake on a suspension fork must be run in housing, but the cable to a front hub brake with a rigid fork must also be run in housing, because flexing of the fork during braking can tighten the cable and lock the brake.
Long descents generate significant heat, so much so that first-generation disc brakes had a problem with failures due to the glue on the pads melting and brake fluid boiling. Shimano has gone to great lengths to overcome these problems, including heat sinks on the pads, and rotors with aluminum cores and cooling fins. Shimano explains that discs are the future for carbon rims, as no one has found a good solution for rim brakes on rims with a carbon braking surface. Shimano was able to convince the UCI, which had banned disks on road bikes, to change its position after providing evidence of the large number of crashes caused by the shortcomings of caliper brakes on carbon rims.
![]()
![]()
Disc brake rotors are available in several sizes. While it is possible to mix and match brands of rotors and calipers, the size of the rotor and the caliper position must match. Larger rotors are a bit heavier, but dissipate heat more readily and make for stronger braking. Smaller rotors, generally for "road" disc brakes, are lighter.
Most mechanical disc brakes use the same long-cable-pull brake levers as direct-pull brakes. Detailed information on these brake levers is here. Other brake levers do not pull enough cable, resulting in weak braking. "Road" disc brakes, on the other hand, work with ordinary brake levers and brake-shift combination levers.
There are several common ways to attach the rotor to the hub. Common ones are the 6-bolt ISO, Hope 3-bolt and Rohloff 4-bolt. Some older patterns are no longer in production, making it hard to find a replacement rotor for an older hub. Shimano Alfine internal-gear hubs have the Centerlock disc-brake fitting. The Shimano Inter-M fitting, used on Shimano Nexus and Nexave hubs, is for the Shimano Rollerbrake, and not for a disc-brake rotor. An adapter, from Cesur, in Germany, has been available to mount a disc brake on a Nexus hub.
There are also different ways to attach the caliper. A large variety of adapters is available, making many combinations possible.
Rotor-caliper alignment is critical so the rotor turns freely except when braking. Though some calipers are adjustable, there is little flexibility in adding or removing spacers at the left side of the hub to address wheel dishing, dropout spacing or chainline.
All in all, there is too much variety among disc brakes to cover here, and it is most prudent to stay with manufacturers' suggested combinations. Chapter 11 of the 7th Edition of Sutherland's Handbook for Bicycle Mechanics has very extensive coverage of disc brakes, and especially of the many types of fittings and adapters. Any good bicycle shop will have a copy -- also see the link below. John Olsen has good technical information in the book High Tech Cycling, and the disc-brake part of the book is online as a preview. (But, buy the book -- there's more good reading there too!).
CyclingSavvy.org has a good generic article about caring for disc brakes. Maintenance is unlike that of any other kind of bicycle brakes, and for hydraulic disc brakes, it differs between brands and models. Improper reassembly or use of the wrong type of brake fluid will result in brake failure. You will need to have the manufacturer's instructions on hand. Most are available on the Internet. Also see links below to other resources.
A disc brake's pads need to be adjusted as close possible to the rotor without rubbing. Three separate adjustments accomplish this.
The wheel needs to be off the ground so it turns freely. You could use a work stand or just hang the saddle from a hook, or over a low tree branch.
Spin the wheel and make sure that the rotor is true. Even a slightly warped rotor will keep the pads from being adjusted close enough without rubbing.
Hydraulic disc brakes are self-adjusting, but a cable-operated disc brake will have a screw adjustment for fine tuning of pad spacing. Many disc brakes have only one pad that advances to apply the brake. That pad flexes the rotor so it also presses against the other pad. Pads are preferably adjusted for the best spacing before final alignment of the caliper assembly.
On a cable-operated brake, coarse adjustment is made with the cable, as with other brakes, but the cable should not be used to adjust pad spacing. The cable should be adjusted so it has no slack but the arm is rotated against its stop.
Following cable adjustment, one pad may be contacting the rotor while the other has excessive spacing. Next, place a thin spacer such as an index card between each pad and the rotor. Adjust the pad spacing till the brake just begins to drag
Finally, loosen the bolts which attach the caliper assembly to its mounting -- not the bolts which face toward the centerline of the bicycle, but those which face forward or downward. These bolts are mounted in slotted holes allowing repositioning of the caliper assembly. Adjust so the two pads are the same distance from the rotor. It should be equally hard to pull out each pad.
For more detailed information online about installing and adjusting disc brakes, see the article on cyclingsavvy.org and the links below.
![]()
![]()
Last Updated: by John Allen