Leather Bicycle Saddle Repair

|

![]()
This page is a companion to our page about leather saddles.
Leather saddles, unlike most plastic saddles, are repairable. Leather saddles can break in three main ways:
Any of these problems can be corrected. But you need all the parts... update from reader Howard Phillips, April 2026:
Howard also notes a decline in the quality of Brooks saddles. I can confirm this in part: I have had rails break on two rather new Brooks Champion Flyers; only one break ever before on a B17, after decades of service. .
Earlier info, no longer entirely current: Brooks repairs saddles at its factory location in England, and as of this writing there are three other authorized Brooks repair locations around the world. Transport Cycles in Philadelphia, Pennsylvania, USA, is one. Transport Cycles covers Brooks warranties.
Simon Firth of Transport Cycles, at your service!
Brooks will extend a warranty to 10 years if a saddle is registered on its Web site. Aaron's Bicycle Repair in Seattle also offers leather-saddle repair. Brooks stocks and supplies replacement parts; repair of old saddles is still entirely possible, because the basic design of Brooks saddles has remained the same for decades. Repair of other brands depends on parts availability. Contact information on repair sites is at the end of this article.
A common repair is for a broken rail. A bicycle collector or museum may wish to replace the leather when restoring an antique bicycle. And two saddles with different broken parts can be combined to make one good saddle.
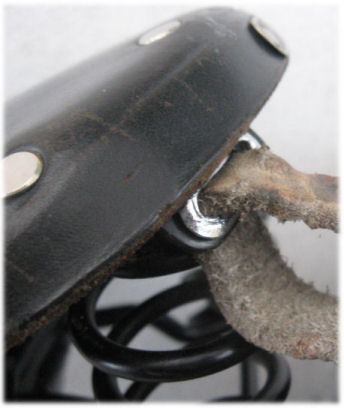
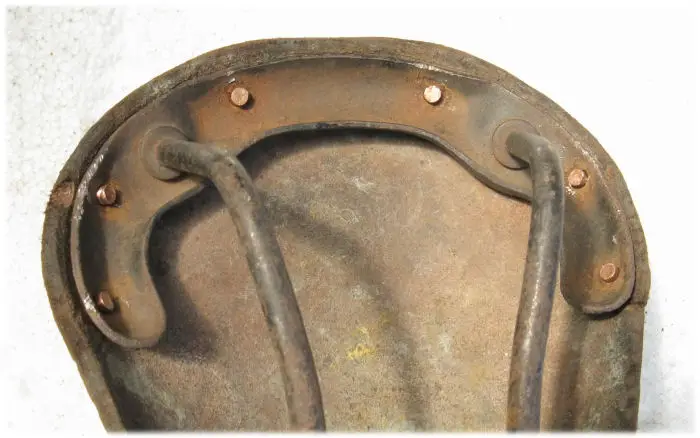
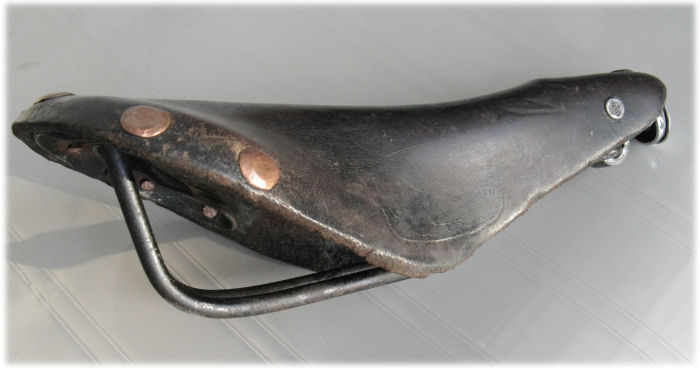
Some older Brooks saddles have a feature which also makes it worth the trouble to replace the leather: ferrules of the type shown in the photo below. They insert into the bag straps. Newer saddles lack these ferrules and can cut through straps. It is worth saving ferrules from a worn-out or broken saddle. They can be pried out and re-used. Brooks sells them too.
![]()
![]()
| U.K. |
Brooks | ||
| Downing Street, Smethwick | Tel: | +81 75 622 7755 | |
| B66 2PA, West Midlands, | Fax: | +81 75 622 7766 | |
| England, UK | Email: | ||
| Web: | Repair enquiry to Brooks | ||
| USA |
Transport Cycles | ||
| 1901 S. 9th Street, Rm 107B | Tel: | +1 215-644-8124 | |
| Philadelphia PA 19148 | Fax: | ||
| USA | Email: | ||
| Web: | Transport Cycles Brooks Saddle Repair | ||
| Japan |
Diatech Products | ||
| Yubinbango 612-8042 Fushimi-ku | Tel: | +81 75 622 7755 | |
| KakinokiHama cho address 431 | Fax: | +81 75 622 7766 | |
| Kyoto, Japan | |||
| Web: | http://www.diatechproducts.com/ | ||
| Germany |
RTI Sports | ||
| Universitätsstraße 2 | Tel: | +49 (0) 2618 999980 | |
| 56070 KOBLENZ | Fax: | +49 (0) 2630 955230 | |
| Deutschland | Email: | ||
| Web: | https://www.rtisports.de/ | ||
![]()
![]()
A home mechanic may also attempt a saddle repair, and it is sometimes possible to cannibalize parts. When a saddle rail broke on a Brooks B17 -- after 30 years of service -- I checked and found that the undercarriage of a Wright's saddle -- Brooks's low-end brand in the 1970s -- was identical except for the finish. I drilled out the rivets from a Wrights saddle and removed its misshapen leather, installed the leather from the B17 and had a perfectly functional saddle again.
To cannibalize saddles in this way, you'll need
If you drill out the rivets from the inside of the saddle, you are unlikely to damage either the leather or the undercarriage.
Drilling out rivets: the leather of this saddle was dried out and cracked.
The undercarriage could use some cleaning up but it is sound.
You need only replace the rivets at the rear of the saddle. The metal shoe inside the nose of the saddle comes off with the top, once you have removed the rivets at the rear. Copper rivets suitable for saddle repair are available at hobby shops, online and from the saddle repairers listed in this article. After flattening large rivets at the inside, you may want to pound their edges down at the outside. An anvil may help. Keep reading for detailed isntructions.

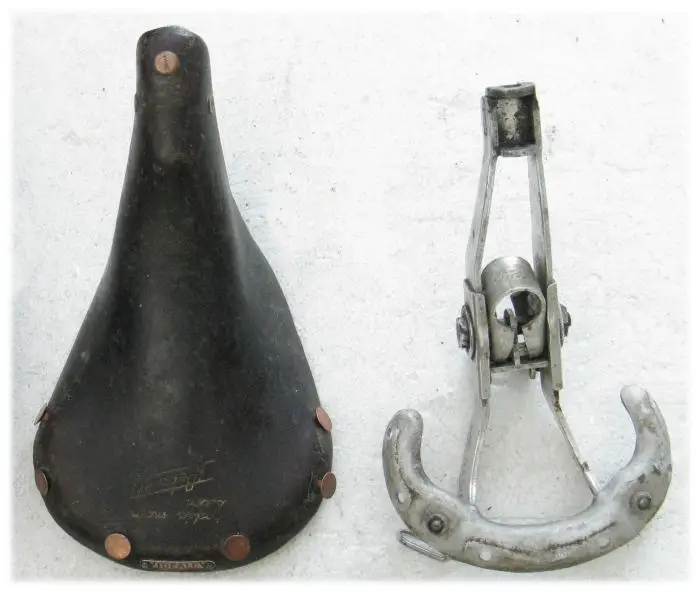
Preferably, when cannibalizing saddles, use an undercarriage with matching locations of rivet holes. If the sheet-metal piece at the rear of both saddles is of approximately the same shape and width, you could drill new rivet holes -- in the metal, not the leather. The two saddles shown in the next picture are not compatible, because the width is too different.
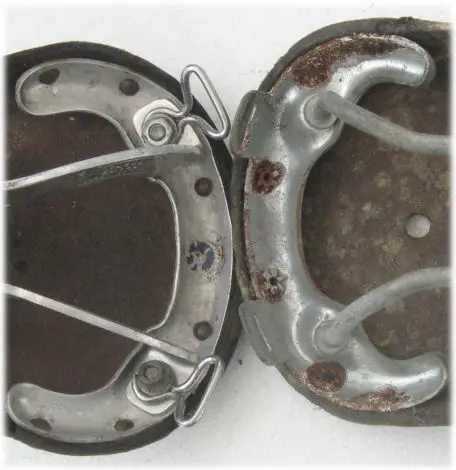
The saddle on the left in the image above is a top-of-the-line Idéale Model 92. The leather is Rodée Main Selon DRebour (broken-in by hand, using the process developed by the great bicycling illustrator Daniel Rebour). Tne aluminum undercarriage cracked around the clamp-bolt hole, and the nose of the saddle would not stay up. These saddles in good shape go for big bucks now. That is all about style and their rarity: the design is flawed. Well, steel saddle rails also do break. In the photo below, I have removed the leather and inserted new rivets.
The rivet locations and the shoe in the nose of the saddle are identical to those of an Idéale Model 80 with cracked leather that I bought for $26 on eBay. This is what happens if a leather saddle is left out in the rain for years, and never re-oiled

Replacement ivets should be a tight fit into the holes in the leather, and just long enough. The scale on the ruler in the photo is in centimeters. The stem of these rivets is about 3 mm or 1/8 inch thick, and about 7 mm or 3/8 inch long. See info above about sourcing rivets.

Bottom-of-the-line bottom, meet top-of-the-line top! Here, I have inserted rivets but not yet hammered on them. If I cared about style, I'd have repainted the undercarriage, or had it chromed. It has lasted for decades with no care and only surface rust. I figured that it will outlast the leather, and why bother.
Preferably assemble the front end of the saddle before installing the rivets or bolts at the rear of the saddle. Loosen the nose adjustment to make it easier to fit the rivets. If the nose assembly has come apart, see instructions lower down in this article.
I made an anvil form an old pedal spindle.
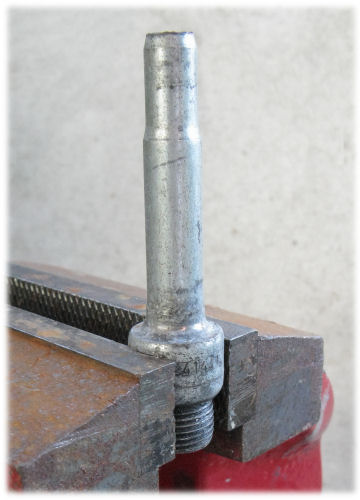
This let me pound the rivets from both the inside and the outside of the saddle, to expand them inside, then form their heads.
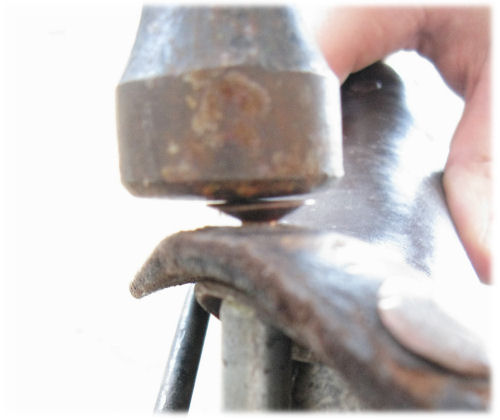
TA-DA, the result! The shaping of the rivet heads could be nicer if I had a ball-peen (rounded-head) hammer and better skills, but the saddle is probably good now for as long as the leather lasts.
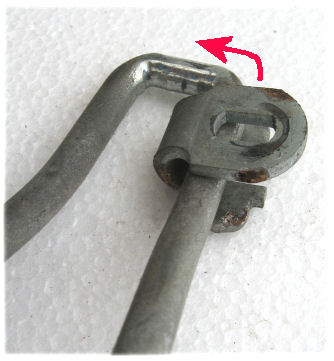
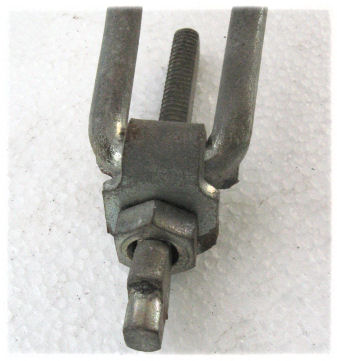
Assembly of the front end of a saddle is a bit of mechanical puzzle, and can be confusing. Install the most common kind of slider at the side, from inside to outside, following the arrow in the photo at the left below. The "wings" of the slider should start facing downward (with the saddle upside-down). Slide the slider around to the front, rotate it into place and insert the nose bolt, with the nut ahead of the slider as shown in the photo at the right.
Getting the nose bolt into place can be difficult if the rails are in place -- though it can sometimes pop out, and if it is adjusted as loose as possible, you may be able to pry it into place with a flat-blade screwdriver, while squeezing the top of the saddle and the rails together with your other hand to tilt the metal shoe at the nose away from the bolt.
 |
 |
With a sprung saddle, you may be able to avoid working with rivets, by disassembling the undercarriage and replacing the broken parts. I did this when the rails broke on a Brooks Flyer.
My Flyer with broken rails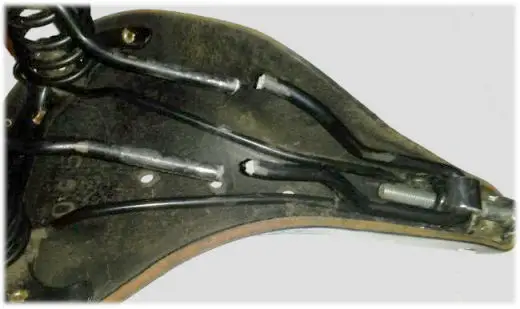
When the rails break, the nose bolt and slider come loose. Let's hope that you didn't lose it them the street -- or if you did, you ordered new ones.
I had the nose bolt and slider. I was able to order a new undercarriage from Brooks. This included springs, but it is easier to undo the nuts at the lower end of the old springs and re-use them, because it is possible to turn the bolts at the lower end. Keep the extra springs as spares: springs also have been known to break.
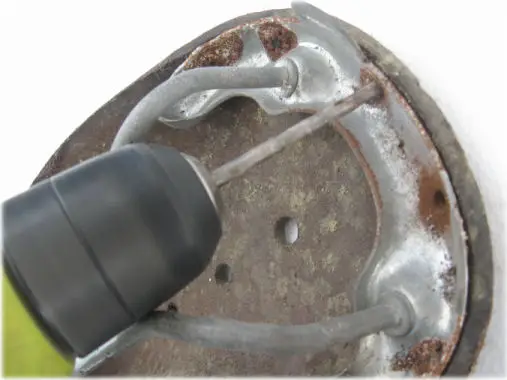
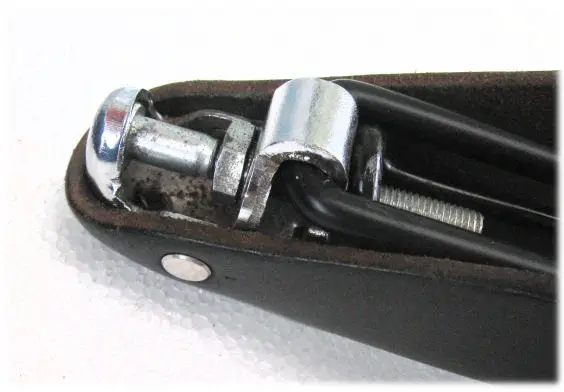
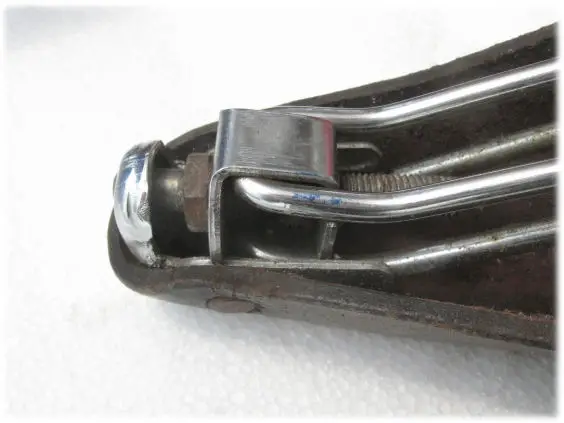
The Flyer saddle has two sets of rails.The set which is closer to the saddle top loops around the nose bolt, as shown in the photos below.
![]()
Nose assemblies may differ. The one in the image below is on a Brooks B72 4-wire saddle. It is a good idea to take a photo before disassembly, as a guide before reassembling.
Re-riveting an unsprung saddle is simple, but getting the wrench past the springs of a sprung saddle can be a bit tricky. Use a thin open-end wrench -- 1/2 inch for the Brooks saddles I've worked on. Getting a nut started is easier if you attach it to the blade of a screwdriver with a dab of grease, to reach in between the coils of a spring.
If a coil of a spring blocks a saddle's bag loop, making it hard to insert a bag strap, loosen the nuts at both top and bottom, rotate the spring, then retighten.
Sheldon strongly recommends not tightening the nose bolt. In his experience, that ruins saddles.
A leather saddle with a repaired undercarriage is as good as new -- no, better than new: it is already broken in!
![]()
![]()
![]()
![]()