Making and Installing an Idler

|
An idler serves to take chain through an angle, and/or adjust its slack. The most common example is with the pulleys of a rear derailer. The sprung idler assembly accommodates different-sized sprockets.
Other common uses of idlers:
If a a run of chain is under tension from pedaling or braking (as with a coaster brake or fixed gear), the idler must be rigidly attached to the bicycle's frame as in the image below. The original idler was a little roller with a flimsy attachment which failed. Can you figure out why a rigid idler is needed here? Keep reading for an explanation...
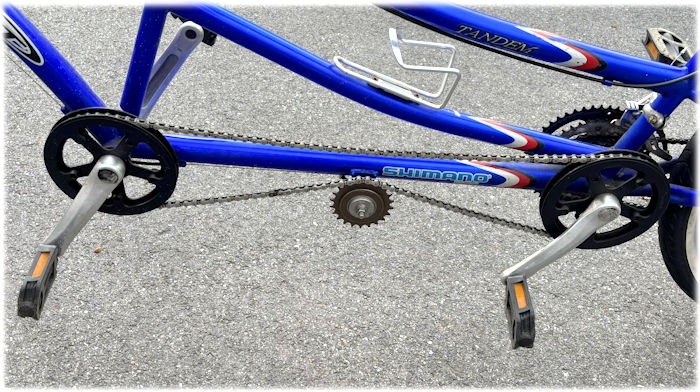
It is easy to make an idler from a freewheel. The rest of this article will describe making and installing one.
![]()
![]()
Everywhere a chain passes over an idler, there is drag from the idler's bearings and from the pivoting of the chain. The drag increases with chain tension. The sharpness of the angle which the chain makes at the idler has little effect on drag from pivoting, as the chain pivots only where it engages and disengages from the idler. The larger the idler, ths slower it turns, and so bearing drag is less. If the idler is in the pulling run, bearing drag becomes more important as the angle becomes steeper. So, to sum up, a larger idler is preferable to reduce bearing drag, and if it must be in the pulling run, a more oblique (flatter) angle is better, up to a certain point: if too flat, the chain can easily come off the idler. Taking the chain under the saddle of a recumbent may require an idler in the pulling run. So be it.
On a tandem,, the pulling run of the synchronizing chain is under tension most of the time, but the return run is under tension when the captain backpedals against the stoker. The return run is the lower run with rear drive and the upper one with front drive. One reason I like front drive is that the idler is better supported and protected by the frame. Front drive also benefits from a second, sprung idler to control the return run of the long main drive chain and increase derailer capacity. See our article on tandem cranksets for more detail.
Unless an idler has teeth, like the one in the image above, it needs a shield to prevent the chain from coming off. Toothless derailer pulleys are poorly suited to the use shown in the image above for this reason. Also,they are small; most have sleeve bearings, and are of plastic so they wear quickly under high chain tension.
You need these tools and supplies to make an idler:
 Hardware to attach the idler to the bicycle frame;
![]()
![]()
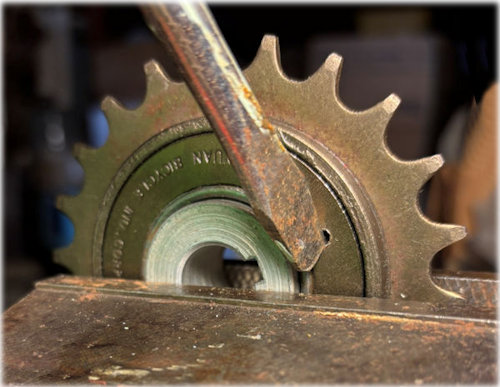
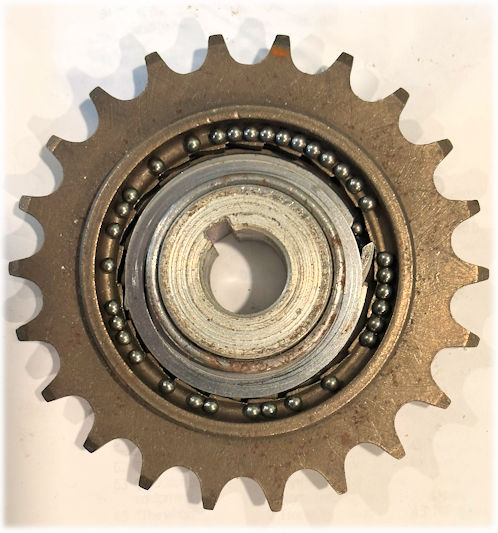
The series of photos below shows how to make an idler from a freewheel. It's like rebuilding a freewheel, as described in another article, except that you remove the pawls. The photos show a single-speed freewheel for the rear axle of a tricycle, but almost any freewheel will do.
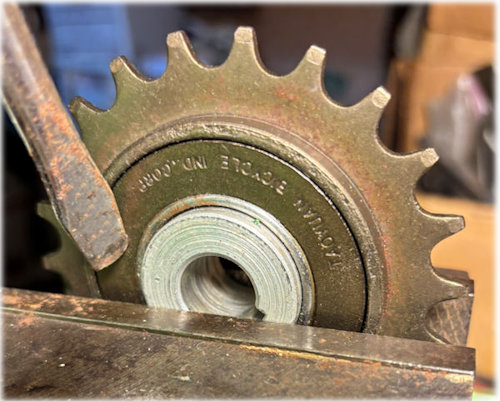
Unscrew the outer bearing race. It unscrews clockwise. This freewheel, made for the rear axle of a tricycle, had flat, protruding inner and outer faces of the inner body. I was able to loosen the cover plate with a hammer and old screwdriver after chucking the freewheel in a vise. The cover plate of most freewheels has two holes where you can insert the tool. Tap at one hole, then rotate the freewheel 180° and tap at the other. At this step, do not remove the cover plate, only loosen it.
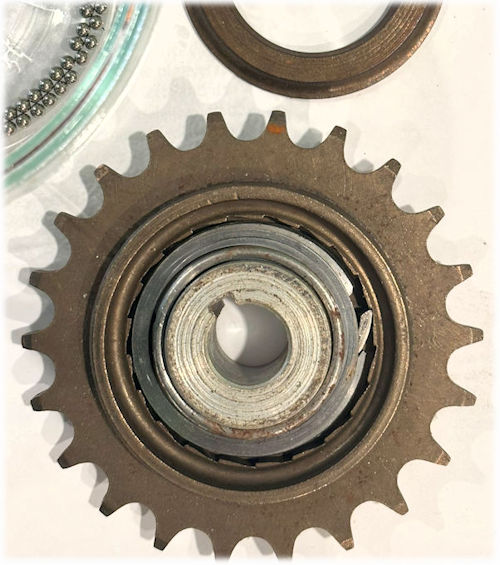
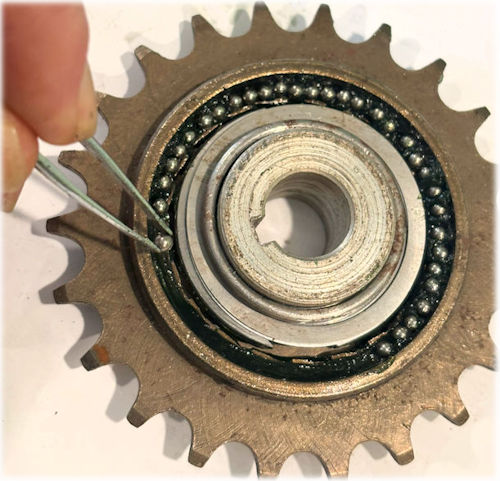
Lay the freewheel flat in a pan, or on a sheet of paper with the edges turned upward, so no bearing balls will roll away and get lost. Unscrew the cover plate and count the bearing balls of the outer race. Record the count. Some already have fallen out in the photo below.
Next, hold the freewheel over a jar. and separate the inner and outer body to remove the bearing balls. Turn the freewheel over if necessary to get them all out. You may need to give them some encouragement if the freewheel was lubricated. This one wasn't.
Remove any shims or other parts which are in the way of the pawls. Both pawls are now visible.
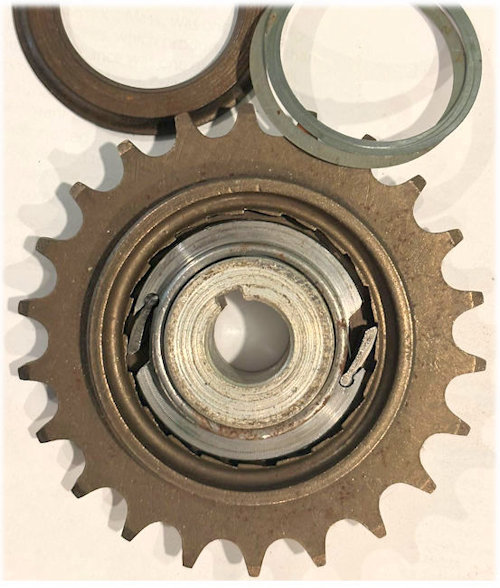
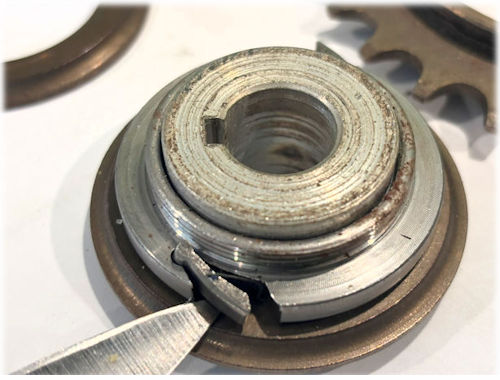
Disassemble the inner and outer bodies from one another. Unless you are rebuilding the freewheel (rather than making it into an idler), pry out the pawls. I found that a paring knife worked well for this. Remove pawl springs if they would interfere with free rotation.
If necessary, clean the inner and outer races and cover plate. Especially, remove grease or oil from the threads of the cover plate and inner body. That was not necessary with this freewheel, as it had never been lubricated. Reassemble the inner and outer bodies to one another. Grease both bearing races to hold bearing balls in place. Be careful not to get grease on the threads of the inner body..

Freewheel bearings have an easy time, because they are in relative motion only when the freewheel is not driving. The freewheel I was modifying had never been used, so I re-used the bearing balls. I normally recommend new bearing balls.
Place the outer body left-side-up, and replace the same number of bearing balls as before. This will not fill the bearing. Do this over the pan or the sheet of paper that is folded up on all four edges so you can recover any stray bearing balls. Reinstall the inner body, turn the assembly over, and replace shims. Install bearing balls. Be careful not to drop any in between the inner and outer body. Shims can keep them from falling in.
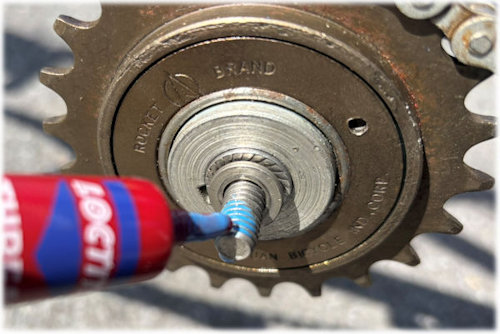
Apply threadlock compound to the threads at the inside of the cover plate, screw it down (counterclockwise!). Tap with the hammer and punch, alternating as you did when removing the cover plate, until it is tight.
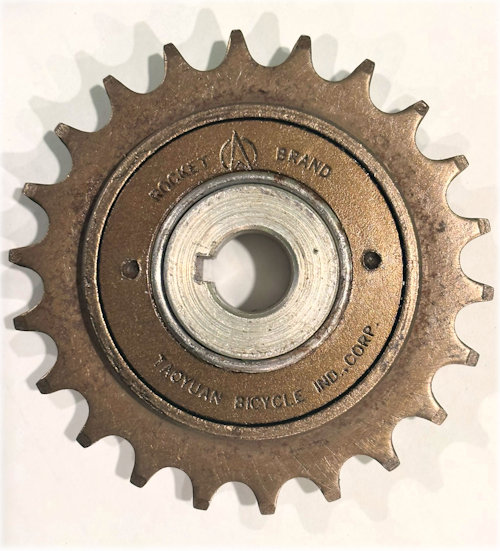
Done! It looks just the same as it did before, but it freewheels both ways.
![]()
![]()
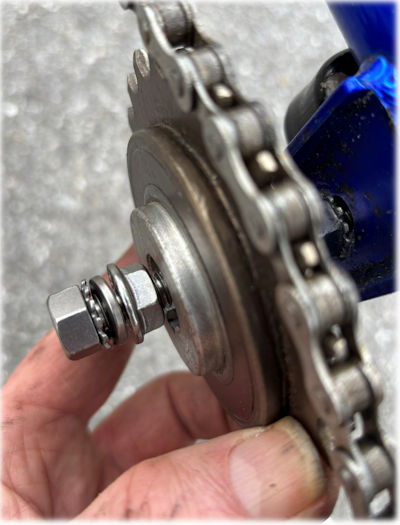
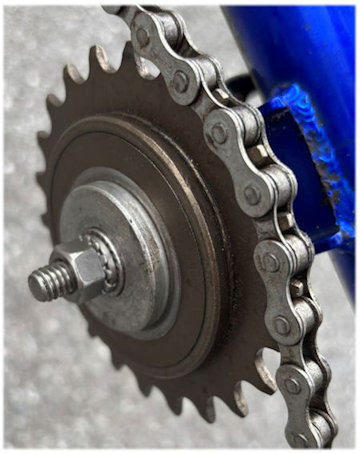
Now to install the idler on a bicycle -- in this case, a cheap but serviceable tandem. It has a slotted bracket midway on the bottom tube. I bought a bolt and several nuts and washers to attach and align the idler. Flanged nuts fit partway into the axle hole at the inside and outside and aligned the idler. Different hardware will be needed for a different freewheel and bracket. Take the idler or candidate freewheel with you to the hardware store to determine what will work.
With the chain loose, adjust it so the cranks are parallel or out of phase, as you prefer. This is easily done by leaving the top run of the chain a bit long, "walking" it shorter by folding a link over another at one of the chainwheels, then turning the crank toward that chainwheel till links engage past the folded part.
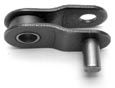
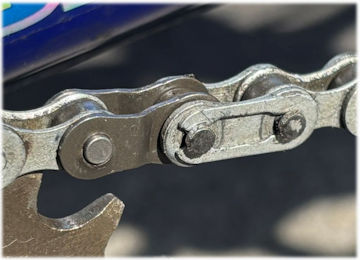
This bicycle needed a half link so the idler would engage. Half links are hard to find at bike shops, but readily available over the Internet. The half link shown here is adjacent to the master link.
It is a good idea to use threadlock compound to prevent nuts from loosening.
Here is the complete assembly.
Here is a photo of an idler made from a multi-speed freewheel, installed on my home-built tandem. The idler isinside the frame with front drive. I removed unnecessary sprockets. To loosen the cover plate of a threaded freewheel, you need to install it on a rear bicycle wheel.

You need to be more careful with bearing balls if the freewheel is threaded onto a wheel. Count them, then replace the cover plate and thread it on lightly. Turn the wheel over and unscrew the cover plate over a pan if you are going to re-use the bearing balls. Then clean off any bearing balls which remain attached to the inner body. You won't need a freewheel remover to remove the inner body from the wheel, because you can chuck it in a vise by the pawl recesses.
Also see our information on chain tensioners and phantom chainrings.
![]()
![]()
Last Updated: by John Allen