What Every Cyclist Should Know About Flat Tires

|

revised by by John "Presta, Change-o" Allen
![]()
A flat tire is by far the most common unexpected mechanical problem that completely disables a bicycle. Why do we put up with flat tires?
Why? Of all the inventions that came out of the bicycle industry, probably none is as important and useful as Dr. John Boyd Dunlop's pneumatic tire. It has such great advantages that no substitute can compete.

Dr. Dunlop looking good on a bicycle with pneumatic tires
A pneumatic tire spreads the load along the rim, and can flatten almost all the way to the rim without any damage, as shown in the video below. Foam-type "airless" tires/tubes cannot compress nearly as far, and concentrate the load.
With good riding technique and equipment choices, most flat tires are avoidable. Also, it is usually possible to repair a flat tire in a few minutes. This article will show how to avoid flats and how to repair a flat tire.
There are related articles on this site about:
Inner tubes: choices, valve types, tips and tricks
A pneumatic tire is made of fabric covered with rubber. The tire is filled with pressurized air, which tensions the fabric.
Because a pneumatic tire is hollow, it can be compressed almost all the way to the rim without any damage. All the air in the tire serves as a spring, and so the air pressure does not increase much as the small segment at the bottom compresses. The fabric spreads the load along the rim beyond the segment in contact with the road surface.
A bicycle tire is not airtight by itself, so it uses an inner tube, which is basically a doughnut-shaped rubber balloon. The inner tube has a valve to allow you to inflate it.
We have another article about inner tubes. It describes inner-tube choices, and the three different types of valves in common use. It is good background material for this article.
(Tubeless tires are beginning to appear on bicycles. They require the rim to be air-tight, adding some complications -- especially on a spoked wheel. Tubeless tires are covered in another article).
Many flat tires are avoidable, though some are not.
Keep a keen eye out for surface hazards to ride around them, or unweight the saddle or hop the bicycle over them. When riding in a group, point down to hazards as you pass them, to alert companions riding behind you.
Some people seem particularly prone to flat tires, often due to poor road position: riding in the gutter instead of the travel lane.
The main travel lanes of most roads are kept fairly clear of glass and other dangerous debris by passing motor traffic. Cyclists who travel in the normal traffic areas of the roadway benefit from this.
Many cyclists, however, hug the curb out of timidity and an irrational fear of being struck from behind by a motorized vehicle. The area close to the curb is where all of the glass shards, sharp rocks and other junk wind up. If you ride too close to the curb, you greatly increase the risk of tire punctures.
Riding too close to the curb also, paradoxically, increases your risk of being hit by a car! By cowering in the gutter, you reduce your visibility. You encourage motorists to pass when there is too little room. You also reduce your maneuvering room, and may have nowhere to go if evasive action is required. Safe positioning on the road is taught in John Allen's Bicycling Street Smarts tutorial -- in print or e-book -- and in instructional programs: CyclingSavvy, League of American Bicyclists Smart Cycling, Can-Bike (Canadian), RoSPA (Royal Society for the Prevention of Accidents) Cycling Proficiency Scheme (U.K) and others.
Bicyclist equipment selection and maintenance also can reduce the likelihood of flats, and are covered in the Equipment section later in this article.
It is best to recognize that a tire is getting soft, rather than that it is already flat.
A soft tire slows you down slightly, but you may not notice anything unusual until the rim starts to bottom out on bumps in the road, and little hard knocks punctuate the soft ride. Or you may notice that the bicycle "wallows" when cornering. Stop! Riding on a bottomed-out tire can damage the tire, inner tube and rim. A flat tire may come off the rim, causing a crash.
If you take a quick look down at your tires from time to time, you may catch a tire going soft.
If a tire starts to feel "lumpy," with a "bump, bump, bump," once every time the wheel comes around, stop! The tire is damaged and likely to blow out. The inner tube is probably still OK. Deflate it right away to prevent a blowout.
A tire may seem fine when you get home and surprise you with a flat the next morning. The League of American Bicyclists and CyclingSavvy promote a pre-ride ABC Quick Check -- Air, Brakes, Chain/Cassette/Crankset, Quick Releases, Check it over. Air is first on the list! Quickly pinching each tire will tell you whether it is soft. The evening is a good time to check: you are more likely to find time to fix a flat then than in the morning. If your trip will be time-sensitive, it's also good to have a plan B -- a second bicycle ready to ride, a spare set of wheels, or access to another mode of transportation.
If you get a flat during a time-sensitive ride, the most practical option may be to park the bicycle securely at your destination and fix the flat later. You might also call a taxi dispatcher, Uber or Lyft to get a van or station-wagon taxi with room for your bicycle. Also, most urban bus lines transport bicycles.
An urban bike-share system requires a walk at the start and end of most trips, but you have only to walk to the next kiosk to trade off bikes in the event of any mechanical problem.
![]()
![]()
Our advice on the tools and supplies to carry with you to fix a flat has been moved to another article. Please read it in connection with this article so you know what tools to get, and are familiar with them.
Flat tires can be divided into four groups for all tires, and a fifth which applies only to tubeless tires.
If you put your bike away for the winter and come back in the spring, the tires will likely be soft or flat, but this doesn't necessarily mean that there is anything wrong with them: you may just need to pump them up. It is a good idea though to hang your bicycle up so it is not resting on flat tires for a long time. They would hold the flat shape, possibly making it hard to seat them evenly on the rims.
Slow leaks that take more than an hour or so to go down can often only be repaired by replacing the inner tube, since it may be impossible to find the hole.
The typical puncture puts a small hole in the tire, which doesn't matter. Patching or replacing the inner tube is the fix for punctures...but don't forget to remove the pointy thing from the tire before you put it back on!
Pinch cuts sometimes ruin tires as well as tubes, but usually the tire will not be damaged.
The impact that causes a pinch cut can also make a dent or "blip" in your rim.
Warning: dirty work. Tires pick up dust and dirt. Especially in winter, rim brakes scrape black particles off wet aluminum rims. For an on-road repair, it is a good idea to carry a pair of light garden gloves in your toolkit. (You might also carry medical gloves for the finer work of patching an inner tube. Black tights, shorts or trousers also are advisable.)
Patching the inner tube without removing the wheel from the bicycle may be faster if the hub has a brake reaction arm or internal hub gear. You then need only remove one side of the tire from the rim. The hardest part, if you leave the wheel on, is slipping the uninflated tube past the shoes of a rim brake if you can't loosen the brake. We have an article with videos showing how to expose the inner tube without removing the wheel.
If you are going to replace the inner tube, though, you must take the wheel off.
Good-quality "road" bikes usually have caliper brakes with a special "quick-release" mechanism to let the brake shoes open up wide enough to fit the tire through. You don't actually need this feature to remove a flat tire, but it is helpful. There will be a button on the brake handle, or a lever on the caliper (or cable hanger) to release the brake a bit.
Bicycles with cantilever brakes, such as most mountain, hybrid, and touring bicycles, usually don't have quick releases on the brakes, so you may have to disable the brake completely by unhooking the transverse cable from one of the arms.
Direct-pull brakes release by unhooking the "noodle."
Many brake levers for flat handlebars have a slotted adjusting barrel. Unless it is set at its loosest position already, you may be able to pull on the cable housing to release pressure on the adjusting barrel, turn the adjusting barrel to loosen it all the way, align the slots, and rotate the cable out through them. You may have to loosen the adjustment before you can unhook the transverse cable or noodle.
In the worst case, you may have to remove, replace and readjust a brake shoe, and that is usually more trouble than deflating and reinflating the tire!
The video below shows most of the ways to release the brake.
You will need a wrench for this. Most rear axles use the 15 mm size, fronts may use 1/2", 14 mm, or 15 mm. If you don't have the correct size wrench, you can use an adjustable wrench. Turn the nuts counter-clockwise to loosen them.
Do not try to do this job with pliers. Even if you do manage to loosen the nuts with pliers, you won't be able to get the nuts tight enough when you put the wheel back in. In addition, the pliers are likely to damage the nuts so that the correct wrench will no longer fit!
To loosen the quick release skewer, once you have flipped the handle, hold the acorn nut with one hand, and then if necessary, turn the handle counterclockwise with the other hand until it is loose enough to let you remove the wheel. For an on-road repair, you stand to the left of the bicycle, or hook the saddle over a tree branch, or have a friend hold the bicycle upright. Do not completely unscrew the acorn nut, because there are a couple of little springs that could get lost if you take it off.
If you're not exactly clear how the quick release works, get somebody to explain it to you before you try removing your wheel. Misuse of the quick release can cause very serious injury!
Some bicycles with quick-release wheels have anti-theft skewers, and a special tool is needed to remove and replace the wheel.
The video below shows how to remove a front quick-release wheel, and replace it: using the adjusting nut, then the lever. The front fork in the video does not have retention tabs ("lawyer tabs"), and so the quick-release adjustment of this bicycle need only be checked, not redone completely.
After freeing the axle by loosening the quick release or axle nuts:
The video below shows how to remove and replace a quick-release rear wheel on a bicycle with derailer gears.
In the case of a hand-operated drum or roller brake, you will also need to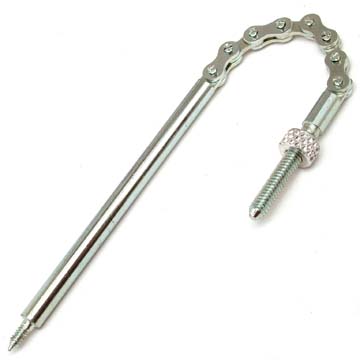 disconnect the brake cable, which can usually be done by unhooking it from the fittings it attaches to.
 in my Sturmey-Archer article.
Some Shimano bellcranks are held in place by a setscrew, and must be removed before the axle nut can be turned. The Shimano 3-speed is adjusted in middle gear, so that the letter "N" is centered in the window of the bellcrank. Take care that you do not lose the pushrod.

![]()
![]()
Before you remove the tire, take a quick look at it to see whether the cause of the flat is obvious. There may be a nail sticking out, or a hole in the sidewall, or some other obvious problem. More often than not, the cause will not be obvious from the outside, but a quick look can sometimes save time.
If the tire is not completely flat, deflate it the rest of the way, by letting air out at the valve. Unscrew and remove the valve cap. Then:
Press the tire down against the ground, to let out as much air as possible.
If you need a more detailed description of the three types of valves, you will find it in our article about inner tubes.
To remove the tire, you need to pull the bead (which is actually a loop of steel or Kevlar cable) off the rim, one side at a time. The diameter of the bead is smaller than the outer diameter of the rim. As long as the tire is centered on the rim, it cannot come off. To remove one side of the tire, you need to put the bead off-center. One part of the bead needs to go down into the valley at the bottom of the rim, so that the opposite side of the bead can be pried over the edge of the rim. This can often be done by hand, but usually is much easier if you use tire levers. Most tire levers have a rounded end and a hooked end.
Often, the bead will adhere to the rim. Push each bead toward the opposite side of the rim, all the way around, to make it easier to remove.
Tire levers commonly come in sets of three, because three is the most you ever need. If the rim is very narrow, the tire may not be able to sink down into the bottom of the rim at the valve, so, pull the tire out near the valve, and it will sink in opposite the valve. For a difficult tire, stick the rounded end of one tire lever under the bead, starting near the valve but not at it.
Insert the lever where one of the spokes lines up. Pry one side of the tire bead over the edge of the rim, then hook the end of the tire lever to the nearest spoke. Insert another tire lever two spokes away from the first, and repeat the process. The third lever goes two spokes away from either of the first two. When the third lever is in place, the middle one will fall out, and you can repeat the procedure. After some number of times, the tire will be loose enough that you can just run a tire lever around the rest of the rim to pull the whole side over.
This is the procedure for tight-fitting tires, particularly for narrow tires. Most tires will come off with less trouble.
After you have removed one side of the tire, reach in and pull out the inner tube. Remove the tube completely, while leaving the other side of the tire in place.
The quickest repair is often to replace the inner tube. Even if you carry a spare tube, you should also carry a patch kit, in case you have more than one flat during a ride.
Keep track of which way the tube was facing in the tire, and pump it up. This will help you in finding a sharp object stuck in the tire. Even if you are replacing the tube, you need to find what punctured it!
You will usually be able to find the hole in the tube by the hissing sound as the air escapes. A slow leak may not make enough noise to hear, unless you pump the tube up enough to stretch it out. Tubes can commonly be inflated to twice their normal thickness or more without risk of popping them, and, as the tube stretches, the hole also gets bigger, making it easier to find.
Your lips are very sensitive to touch, and if you hold the tube close to them, you can sometimes feel the air coming out. Wetting your lips may make them more sensitive. For very slow leaks, as a last resort, you can immerse the inflated tube in water and look for bubbles. Don't do this unless you need to: the tube must dry before you can patch it..
Sometimes the valve leaks, and with a Schrader valve, you can wipe spittle over the top of the valve and see whether it expands into a bubble.
When you find the hole, make note of where it is with respect to the valve hole, also whether it is on the inner or outer side of the tube.
Rim-tape failure at a recessed spoke hole, and resulting puncture

Use the valve hole in the rim to align the tube with the tire, to help find what caused the problem. Finding an offending object in the tire can help you find the hole in the tube, and vice versa.
Taking the tire off the rim allows you to examine the inside of it carefully. Thorns and glass slivers can hide, and may be difficult to remove. I find that pushing them back out through the tread, using a sharp instrument, is often helpful.
This small piece of wire, probably from a steel-belted car tire, must be removed.

In addition to looking for sharp pointy things poking through, look also for broken cords or cuts in the fabric of the tire. If you find such cuts that run more than a millimeter or two, you should replace the tire when possible.
With a tubeless tire, the sealant (or a new dose of sealant) may fill the hole and stop air from escaping. If not, you may need to boot the tire, as described below -- and you should also be carrying an inner tube, to hold air and keep the boot in place.
One thing that is often tried, but doesn't work too well, is the rubber patches made for inner tubes...they are too stretchy.
A boot doesn't need to be glued in place: it will stay put just from the pressure of the inner tube against the tire.
Even the best of boots should only be considered a temporary repair. The tire will be less reliable, and you may feel a bump every time the tire goes around.
For both speed and economy, you can patch the punctured tube when you get home. Inner-tube patching is a very old, well established technology, and is quite reliable if done properly, but installing a spare inner tube is convenient in cold or wet weather, and faster than patching if wheel removal and replacement are easy.
Only patches that are cemented to the tube with a special rubber cement are reliable. Duct tape can serve for a temporary patch, though it does not stretch like a rubber patch. A "glueless" patch may work for a quick on-road repair, but is not to be trusted for the long term.
Some patch kits have thick patches and a grater. Don't use these on bicycle inner tubes. Patch kits made for bicycles contain thin patches with rounded contours and tapered margins, a small piece of sandpaper, and a special rubber cement. Here's how to patch an inner tube:
If there is a molding line running along the area where the patch is to be applied, you must sand it down completely, or it will provide an air channel. Jobst Brandt suggests carrying a Bic razor blade in your patch kit to slice off mold lines. [I tried this and cut a hole in the tube -- back to sandpaper. John Allen]
You could lightly sweep away the sanding dust with the heel of your hand., but avoid touching the buffed area with wet or greasy fingers.
Work quickly. You want a thin, smooth coat of cement; if you keep fiddling with it as it begins to dry, you'll risk making it lumpy. The thinner the cement, the faster it will dry.
The video below illustrates this process.
If you follow this procedure, and use good materials, your patched tube should be basically as good as new. (Unless you plan to ride down long mountain grades, using rim brakes. If patches get very hot, they can come unglued).Patch failure generally results from one of four errors:
For more technical detail, see Jobst Brandt's comments.
![]()
![]()
If you try to pry the tire on using tools, you are very likely to wind up pinching the inner tube between the tool and the rim, puncturing it.
It is usually helpful to have a little bit of air in the tube: just enough to make it sort of round rather than flat. With Presta-valve tubes, I usually just blow air into the tube by mouth.
It sometimes helps to stretch a brand-new tube first. I do this by stepping into it and lifting away by hand.
If you have patched the inner tube without removing the wheel from the bicycle, check out our article which shows how to replace it, but also please read the instructions below, which include some useful tips.
Start by fitting the valve of the inner tube through the valve hole. You may need to lift a rubber rim strip up at the valve hole and slip it all the way onto the valve stem so the valve stem doesn't try to drag it into the valve hole. Loosely secure the valve using a valve cap or jam nut so it won't fall back through the hole. If your valve is threaded for jam nut, don't tighten it down very far, just thread it on far enough that the valve can't fall out of the rim.
With the tube dangling down along one side of the wheel, install one edge of the tire onto the rim, so that the tube is hanging out of the open side. This is usually pretty easy.
Next, tuck the tube into the tire. It is best to start at the valve, work your way one third of the way around the tire, then go back to the valve and work around in the opposite direction.
Once the tube is in place, you're ready to install the second side of the tire. This is the hardest part of the whole process, and the hardest part of this is the very last segment.
If you start at the valve, it won't be a complicating factor when you are trying to lift the last bit of tire bead over the edge of the rim. With a very narrow rim, you may have to start opposite the valve -- just don't finish right at the valve.
As you install the second side of the tire, try to push it toward the middle of the rim channel, where the channel is deepest. This will give you more slack.
Make sure that the tire bead is not sitting on top of the base of the valve. If it is, push the valve almost back through the rim to raise the reinforced patch at the base of the valve, and push the tire down around it.
Some considerable force may be needed to pop the last few inches of tire bead over the edge of the rim. (Some rim/tire combinations are easier than others.) If it is giving you difficulty, resist the urge to press the middle part over. Instead, work alternately from each end of the section you're trying to lift over. Going back and forth from side to side will usually get it.
Most folks do this by holding the wheel horizontally, with the open side up. Wrap your fingers around over the tire to press on the bottom of the rim, while you push the tire either with your thumbs or with the heels of your hands.
If you just can't get it by hand, here are some things to check:
The rim tape must be just wide enough to fit the bottom of the rim. Too narrow, and it doesn't cover what it needs to. Too wide, and it rides up as shown in the photo below, preventing the tire from seating correctly. The tire will be too far out where it rides on the rim tape, and too far in at another place. It will give a bumpy ride, and there is a risk of a blowout.
Rim tape too wide
Some tire/rim combinations are just too tight a fit, and you may need to use a tool. The best tool for this is the "Kool Stop bead jack" because this tool lifts the edge of the tire without going inside of it, so it is less likely to damage the inner tube than a conventional tire lever is.
You are less likely to have a problem seating your tire if you have the wheel off of the ground before you start. If the tire is completely flat and is sitting on the ground with the weight of the bike on it, the part that is at the bottom is likely to seat incorrectly.
Generally, if your bike has quick-release brakes, it's best to inflate the tire before putting the wheel back on the bike. If you don't have quick-release brakes, though, it's easier to install the wheel before pumping up the tire.
It's best to start by inflating the tire just enough that it takes shape, maybe 20-30 PSI, and to check that it is seated properly before full inflation. Check the seating by spinning the wheel and watching the tire.
Once you're sure the tire is properly seated, inflate it to full pressure.
There are several types of inflators, but to inflate a tire during a ride, a frame pump or mini pump is usual.
Older frame pumps have a hose that screws onto the tire valve. This works poorly with a Schrader valve because air escapes when the hose is being unscrewed. Newer pumps have a clamp-on head that holds pressure better.
As you pump your tire up closer and closer to full inflation, the pump gets harder and harder to push. This is particularly an issue with narrow tires that need to be pumped up to high pressures.
Your arms may not be strong enough by themselves to get such a tire up to adequate pressure. Assuming you're right-handed, it can help to brace your left hand on the pump head. If there's a convenient tree, I'll often lean the pump head against the tree, so my left arm doesn't actually need to do any work. If there's no suitable tree or other solid object handy, or if I'm topping off a tire without removing the wheel from the bike, I'll kneel on my right knee and brace my left wrist against the inside of my left knee.
As I approach full inflation, and the pump gets harder to push full-stroke, I will start each stroke with my right arm free, then brace my right wrist against my chest for the final, hard part of the stroke, and use my back to complete the stroke.
It is very important that any type of pump be pushed all the way to the end of its travel on each stroke, otherwise you're wasting most of your effort. Air only goes into the tire once the pressure in the pump is higher than in the tire. You can feel the transition near the bottom of the pump stroke, when it stops getting harder to push. Also, the pump also will get its full intake of air only if you pull it all the way to the top of the stroke.
Be careful not to bend or twist the valve stem when using a frame pump with an integral head. Bracing the pump against a tree or a rock can help to hold the valve stem straight, so you don't risk breaking it off or tearing the inner tube. A pump with a hose avoids this problem.
Most tires have a "witness line" molded into each sidewall. This is a narrow ridge of rubber running around the side of the tire, just outside of the rim. Spinning the wheel and observing the witness line will help you locate the place where the seating might be off.
If the bulge is right at the valve, this usually indicates that the tire is sitting on the reinforcing patch at the base of the valve. Completely deflate the tire, and push the valve up into the tire with your thumb, while pressing the tire down around it, then pull the valve back down before inflating.
If your tire dips inward at one spot, without bulging out at another, it is usually a sign of an unusually tight fit. Or, if the bicycle has been sitting on the floor with an uninflated tire for a long time, it will have developed a "memory" flat spot and you may need to overinflate it to get it to seat on the rim. This may make it a bit of a struggle to install the tire, but it also means that you can get away with considerable overinflation with no risk of blowing the tire off the rim. Indeed, the best way to seat a "dipping" tire is by temporarily overinflating it until it "pops" into position. A tire may also dip because a rim strip is raising it slightly, so check the rim strip.
In some cases it may be beneficial to lubricate the side of the tire. This can be done with soapy water, but I usually use spray window cleaner for this, because it doesn't leave a soapy residue on the braking surface of the rim.
A tight fit is safer because it will hold the tire in place if it blows out during a ride. A loose tire will flop around, making the bicycle impossible to balance, and can catch on a rim brake, locking the wheel. If it is the front wheel, this can result in a very sudden and serious crash.
Re-installing the wheel is a critical task, and if you don't do it right, the wheel can fall out, leading to a serious crash. This is particularly important on the front wheel. If it falls out you will probably land on your face!
Hundreds of people suffer gruesome injuries every year as a result of improper use of front-wheel quick releases, but if you understand their operation, they're quite safe and secure.
The quick-release handle can move two ways: it can twist around like a wingnut, or it can flip 180 degrees outward and back, like a hinge.
The twisting motion adjusts the operating range of the quick release. You may have to hold onto the cone-shaped nut at the other end of the axle. You can't get the quick release tight enough by turning it.
The hinge-like flipping motion is the locking motion. In the "open" position, the quick release handle curves away from the bike. In the "locked" position, it curves toward the bike. (Very old levers are not curved, though -- but the tight position then is with the lever pointing clockwise at its base.) Never, ever ride with the lever in the open position, or partway closed!
If the quick release is too loose, the flipping motion will be easy, but it will not hold the wheel safely -- flip it back, turn the adjusting nut (or with a thru axle, the handle) clockwise some more, then try again. The front forks of many newer bicycles have retention tabs to keep the wheel from falling out if the quick release is loose. These require undoing the adjusting nut by several turns before the wheel can be removed. You must screw it back in and readjust it when reinstalling the wheel.
If the handle is too hard to flip, and you cannot get it to flip far enough to lie flat, loosen the adjustment by turning the adjusting nut counterclockwise. There is a range of only a small fraction of a turn where the adjustment is correct, so you will probably have to repeat the adjustment.
It should take a good firm push to get the handle to lie flat. You will feel the resistance of the lever decrease for the last little bit before the lever lies flat; then it will come up hard against a stop. The decrease in resistance happens as the cam goes over center -- it actually loosens slightly as it reaches its closed position. Then vibration tends to tighten it rather than loosen it.
It is a good idea to set the front quick release so that the handle points toward the rear when it is closed. This reduces the chance of getting it snagged on something. Flip the handle to the loose position, turn the handle and the cone-shaped nut together to align the handle once it has been adjusted -- then retighten.
Racers commonly face the rear quick-release lever upward, next to the seatstay, so contact with another racer's front wheel in a pack will not open the lever.
It is customary for the quick-release handle to be on the bicycle's left side, keeping the rear handle out of the way of the derailer. With a front disc brake, though, it is more convenient for the handle to be on the right side.
Newer derailer-equipped bicycles mostly have "vertical dropouts" for the rear wheel, so the wheel can only go in one spot. No adjustment is required with vertical dropouts.
A thru axle needs to be threaded in. The axle may have a quick-release handle, or the handle may just spin around to tighten it.. The adjusting nut on the forkend opposite the handle is used only for an initial adjustment, to establish which way the handle faces when tightened.
Bicycles that don't use quick-release hubs normally have axles with nuts and washers that tighten against the forkends of the bicycle. It is vitally important that these be securely tightened with a wrench.
Internal-gear hubs have tabbed or ridged anti-rotation washers which fit into the dropout slots, to keep the axle from turning. Generally, tabs should face the open ends of the slots. You will also have to reconnect and in some cases readjust the shifter cable.
When reinstalling the wheel, the chain on a non-derailer bicycle must be adjusted for minimum slack, so it won't fall off and doesn't bind. Instructions are here. If there is a brake reaction arm, attach it loosely, adjust the chain, then tighten the reaction arm. See advice here.
Make sure to check the brakes after you have re-installed the wheel, especially if you disconnected the cable or used a brake quick release to make it easier to remove the wheel.
![]()
![]()
Information near the start of this article tells how to ride to avoid flats. Equipment choices and maintenance also can help to prevent them.
Tires commonly have a recommended inflation pressure range, or at least a maximum value molded into the sidewall. These values are only very approximate, and experienced cyclists rarely pay much attention to the rated pressure.
A major cause of "snake bite" flats is underinflation. Underinflated tires also have increased rolling resistance, making it harder to pedal.
Less well known is the downside of overinflation: this causes a harsh ride and can also cause poor traction on bumpy surfaces (overinflated tires tend to bounce, and a tire that is airborne, even for a moment, has no traction!)
A correctly inflated tire will have a slight bulge where it is in contact with the road. The correct inflation pressure is determined by the weight load, the tire width, and, to some extent, the riding surface.
Foam-type tires or tire inserts have been obsolete for over a century, but crackpot "inventors" keep trying to bring them back. They are heavy, slow and give a harsh ride. They are also likely to cause wheel damage, due to their poor cushioning ability.
Airless-tire schemes have also been used by con artists to gull unsuspecting investors.
Dockless bike-share bikes get left wherever a ride ends. These bicycles commonly have airless tires., to reduce the need to collect them for servicing. These bicycle were common in US urban areas around 2019, but are rarely seen as of 2021.
In some regions, notably the Southwestern U.S., "goat-head" (tribulus terrestris) thorny seeds are so common that such liners, thornproof tubes, or sealant, are a desirable option.
A special liquid is available to insert into the inner tube through the valve along with the air, and which spreads around inside the inner tube as the bicycle is ridden. The liquid hardens as it exits the inner tube through small punctures, and closes them off. Sealant is probably the most practical solution for goat-heads. They can be picked out following a ride, and the sealant will continue to work. It will not close larger gaps, though, and can spray out and make a mess. It also may not work if tires are run at high pressure. Also, it dries out, requiring yearly replacement of the inner tube. There is a very thorough discussion of the use of sealant in tires with inner tubes elsewhere on the Internet.
Sealant is required with some tubeless bicycle tire systems, and with these, the messiness occurs whenever a tire must be replaced. Sealant can clog the valve: a removable/replaceable valve core makes this problem easier to deal with. Schrader valves work better than Presta with sealant because the opening is larger.
Thornproof tubes are heavy, and add to rolling resistance, so they are a poor choice for cyclists who ride in conditions that don't require them. See also tire liners and sealant.
Some punctures are caused by glass slivers or thorns gradually working their way through the tire tread. A small, sharp object may be picked up by the tire, then gradually work its way in over the course of several tire revolutions. The pointy thing is driven in like a nail into wood by repeated blows against the pavement. A formerly popular device called a "tire saver" or "flint snatcher" used a loosely-sprung piece of wire (generally made from a bicycle spoke) to brush the tire tread constantly in hope of dislodging glass slivers and the like before they could penetrate all the way to the inner tube.
These are of dubious value in practice, but may be of help where goat heads are prevalent, and in backward areas where throwaway beverage bottles are still legal and glass slivers are a major problem.
![]()
![]()
![]()